Understanding how to organize a furniture inventory before moving is essential for anyone planning a smooth, efficient, and cost-effective relocation. A furniture inventory is a structured list of all items you plan to move, including their condition, quantity, dimensions, and value.
By organizing your inventory properly, you can:
- Prevent lost or damaged items
- Optimize moving costs
- Simplify unpacking and setup
- Improve coordination with movers or storage providers
Think of it as your master control system for the entire moving process.
Why Furniture Inventory Matters Before Moving
Before diving into the process, it’s important to understand why this step is critical.
Key Benefits
- Avoid Missing Items: Studies show that up to 15% of moving issues involve lost or misplaced belongings
- Accurate Cost Estimation: Movers calculate pricing based on volume and weight
- Insurance Protection: Proper documentation helps with claims
- Better Space Planning: Helps decide storage or new layout
Pro Tips: Always start your inventory at least 2–3 weeks before moving day to avoid last-minute stress.
Step-by-Step Guide: How to Organize a Furniture Inventory Before Moving
Step 1: List All Furniture Items Room by Room
Start by breaking down your home into sections:
- Living room
- Bedroom
- Dining area
- Office
- Storage areas
Then list each furniture item under its respective room.
Example Table:
| Room | Item | Quantity | Notes |
|---|---|---|---|
| Living Room | Sofa | 1 | 3-seater |
| Bedroom | Wardrobe | 2 | Wooden, large |
| Office | Desk | 1 | Glass top |
Pro Tips: Work systematically, don’t jump between rooms. This reduces the chance of missing items.
Step 2: Categorize by Size, Value, and Fragility
Not all furniture is equal. Categorizing helps prioritize handling.
Categories:
- Large & Bulky: Beds, wardrobes, dining tables
- Fragile: Glass tables, mirrors
- High-Value: Designer furniture, antiques
- Disassemblable: Shelves, modular units
Why This Matters:
- Movers will handle fragile items differently
- High-value items may need insurance
- Bulky items affect transport cost
Pro Tips: Use color labels or tags (e.g., red = fragile, green = standard).
Step 3: Document Condition with Photos
Take clear photos of each item:
- Front view
- Close-up of any existing damage
- Unique features
This creates a visual record for:
- Insurance claims
- Dispute prevention
- Condition tracking
Quick Checklist:
- Good lighting
- Multiple angles
- Timestamp enabled
Step 4: Assign Inventory Codes or Labels
Each item should have a unique identifier.
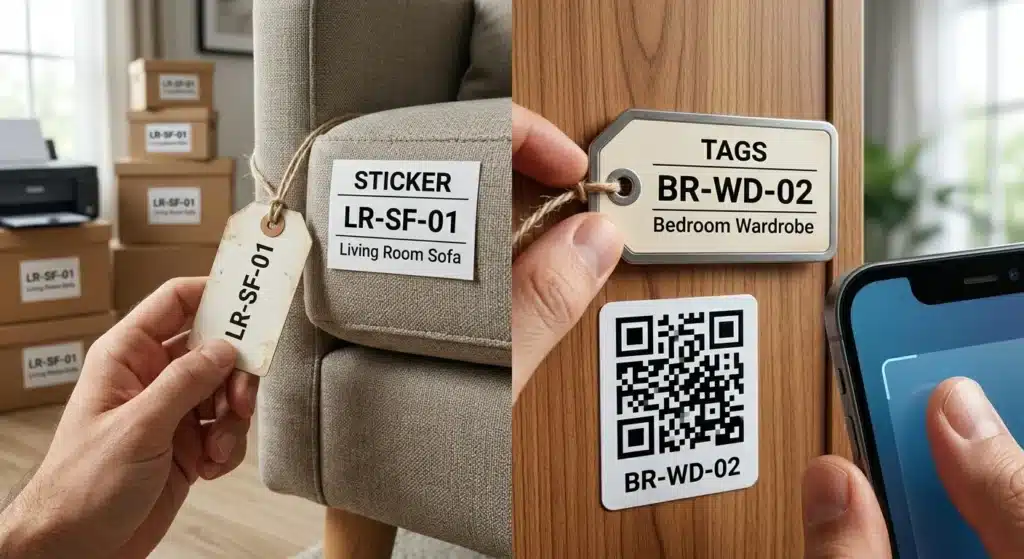
Benefits:
- Faster loading/unloading
- Easier tracking
- Better coordination with movers
Pro Tips: Match labels with your digital inventory sheet for consistency.
Step 5: Measure Furniture Dimensions
Measure:
- Height
- Width
- Depth
This helps with:
- Truck space planning
- Elevator access
- Doorway clearance
Sample Table:
| Item | Height | Width | Depth |
|---|---|---|---|
| Sofa | 90 cm | 200 cm | 80 cm |
| Wardrobe | 210 cm | 150 cm | 60 cm |
Step 6: Decide What to Move, Sell, or Store
Not everything needs to move with you.
Options:
- Move: Essential items
- Sell/Donate: Unused furniture
- Store: Seasonal or excess items
If you’re unsure about storage solutions, check this guide: what are storage service
Insight: Research shows that decluttering before moving can reduce moving costs by up to 30%
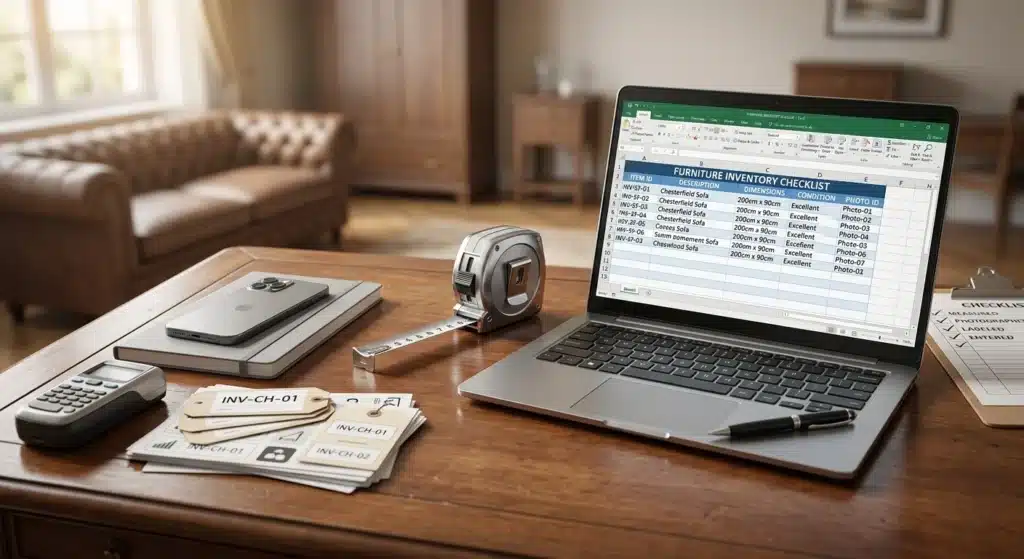
Step 7: Create a Digital Inventory System
Use tools like:
- Google Sheets
- Excel
- Inventory apps
Suggested Columns:
- Item Name
- Room
- Condition
- Value
- Label Code
- Notes
Benefits:
- Easy updates
- Shareable with movers
- Backup security
Noted: Keep both digital and printed copies for safety.
Simple Inventory Workflow
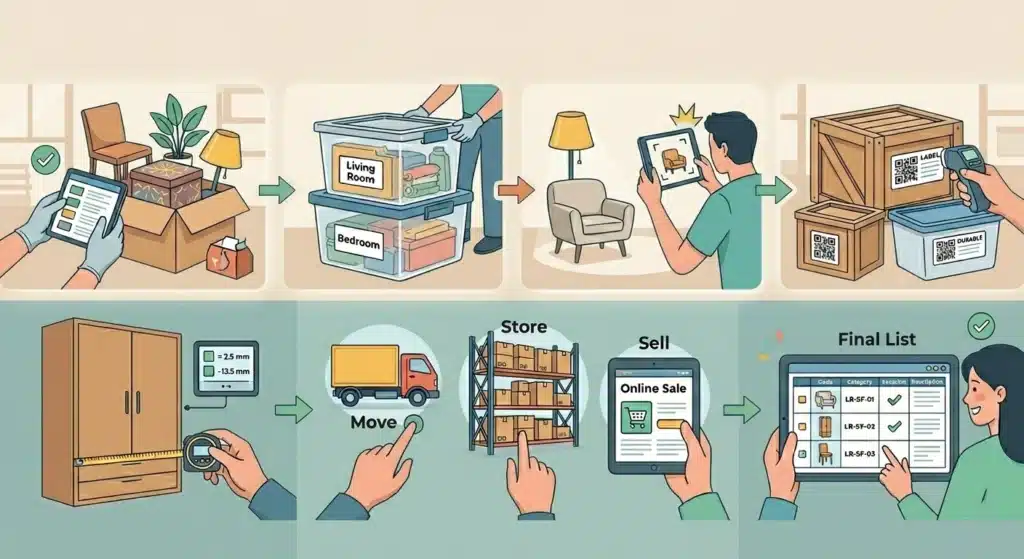
Identify Items → Categorize → Photograph → Label → Measure → Decide (Move/Store/Sell) → Final Inventory List
This structured flow ensures nothing is overlooked.
Common Mistakes to Avoid
- Skipping small items
- Not labeling properly
- Forgetting measurements
- Ignoring item condition
- Last-minute inventory creation
Case Study: Efficient Moving with Inventory Planning

A small family relocating within Singapore reduced:
- Moving time by 25%
- Damage claims by 90%
How?
- Detailed inventory list
- Proper labeling
- Strategic storage use
This shows how powerful proper planning can be.
Tools & Checklist for Furniture Inventory
Essential Tools:
- Measuring tape
- Smartphone camera
- Labels/stickers
- Spreadsheet software
Quick Checklist:
- List all items
- Categorize furniture
- Take photos
- Label everything
- Measure dimensions
- Decide move/store/sell
- Create digital inventory
Conclusion: Plan Smart, Move Smarter
Mastering how to organize a furniture inventory before moving is one of the smartest steps you can take to ensure a smooth relocation. It minimizes stress, prevents loss, and keeps everything under control from start to finish.
If you’re planning a move and need reliable storage or moving support, explore professional solutions at: thestorageplace.com.sg.
With the right system and support, your move can be efficient, organized, and completely hassle-free.
Frequently Asked Questions
How detailed should a furniture inventory be?
It should include item name, condition, dimensions, and photos. The more detailed, the better for tracking and protection.
Should I use digital or manual inventory?
Digital is recommended for flexibility, but having a printed backup is always smart.
How early should I start organizing inventory?
At least 2–3 weeks before moving day to avoid rushing and missing items.
Do movers require an inventory list?
Most professional movers prefer or require it for accurate pricing and logistics.
What items should not be included?
Exclude items you plan to sell, donate, or discard before moving.