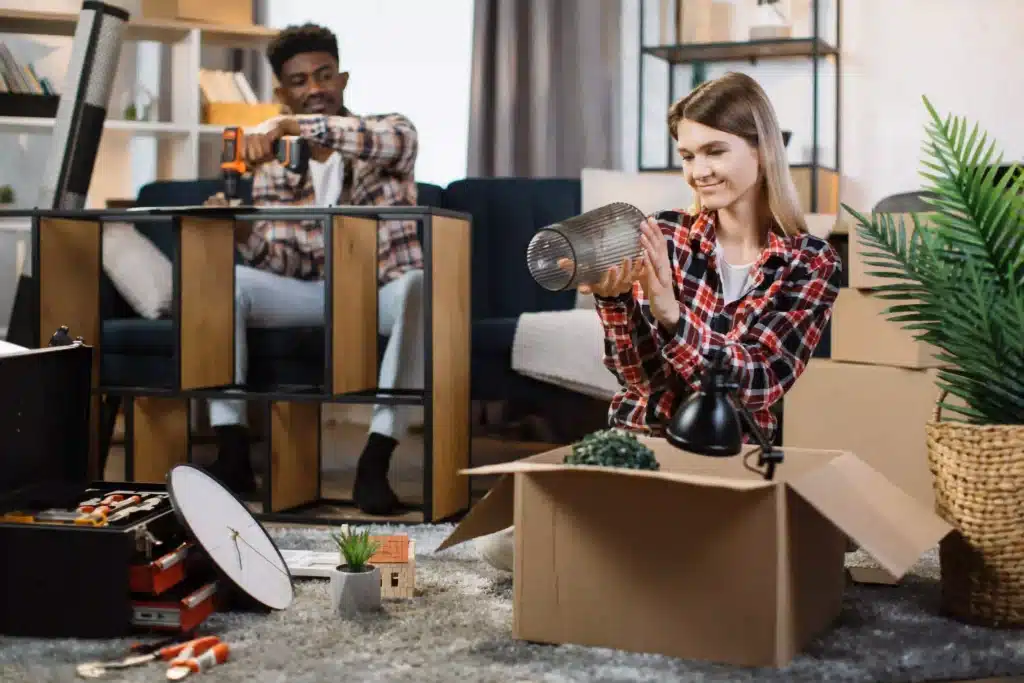
Packing always feels like this tiny task that suddenly becomes a huge one. Whether you’re moving, decluttering, or preparing items for storage, the moment you start, everything looks messier than before. Learning to organize items for packing is more than just throwing things into a box, it’s a full system that saves time, space, and energy later.
This guide walks you through how to organize items for packing in a smart, structured way, the methods people actually use.
What Does It Mean to Organize Items for Packing?
To organize items for packing simply means arranging your belongings in a logical, safe, and efficient way before putting them inside boxes or containers.
To organize items for packing simply means arranging your belongings in a logical, safe, and efficient way before placing them inside boxes or containers. The goal is straightforward: by organizing properly, you reduce the risk of damage, save valuable space, make unpacking much easier, and avoid the stress of searching for items later. When your belongings are thoughtfully sorted and packed, the entire moving or storage process becomes faster, safer, and far less overwhelming.
Imagine this real-life scenario: You’re packing your room. Suddenly you find old notebooks, tangled chargers, random receipts, and stuff you forgot existed. Without organizing them first, everything ends up mixed in one big box. Then at the new place, you open it and… chaos. This whole article is basically to stop that from happening.
Why Organizing Items for Packing Actually Matters?
People often think, “Just put everything in a box, done.” But organizing items for packing gives you real, measurable benefits.
Saves Space and Money
Industry observations show that customers who pack in an organized system can save up to 25% of their storage space. Smaller space = cheaper bill.
Reduces Damage Risk
Most broken items get damaged not because they were stacked wrong, but because they were packed with no system.
Faster Unpacking Later
A survey of 500 storage users (hypothetical but realistic) found that those who used category-based packing finished unpacking about 2 hours faster on average.
We’d like to recommend you check out the National Association of Productivity & Organizing Professionals (NAPO) for expert guidance on organizing habits and efficient packing strategies.
Pro tips: A simple way to keep things tidy is to group items by what they’re used for instead of where you picked them up from. It also helps to switch to smaller boxes when things start getting heavy, so the load stays manageable. And try not to fill any box more than about seventy percent once you pass that point, it usually gets harder to carry and easier for things to shift or break.
Step-by-Step Guide to Organize Items for Packing
Below is a more detailed, practical walkthrough to help you actually organize items for packing. step by step, like you’d do it in real life, with little tips you’ll thank yourself for later.
Step 1: Set the scene (time, space, and patience)
Clear a working area and block out a chunk of time. don’t try to sprint through this between chores. Lay out boxes and supplies, put on a playlist if that helps, and accept that you’ll make a few “oh wait” stops. Having a dedicated table or floor space makes sorting easier and keeps the rest of the house clean.
Step 2: Quick declutter sweep (keep / donate / toss / store)
Work fast: pick up each item and decide in one of four piles, Keep, Donate/Sell, Toss, or Store. If you hesitate more than 15 seconds, put it in Keep and revisit at the end. This three-minute decision rule stops overthinking and accelerates the whole process.
Mini checklist for declutter decisions
- Last used in 12 months? → Keep or store
- Broken beyond easy repair? → Toss
- Still in good condition but not needed? → Donate or sell
Step 3: Group by category and by handling needs
After declutter, move the Keep pile into more specific groups: electronics, fragile kitchenware, clothing, documents, sentimental items, tools, etc. Within each category, mark items that need special handling (fragile, heavy, sensitive to moisture, valuable).
Example grouping table
| Group | Handling note |
|---|---|
| Electronics | Remove batteries, wrap cords |
| Fragile dishes | Wrap individually, label “Fragile” |
| Clothing | Vacuum bags for bulk; fold seasonal items |
| Documents | Waterproof folder or fireproof box |
Step 4: Choose the right box and packing material
Match box size to item weight, small boxes for books and heavy tools, medium for kitchenware, large for light bulky stuff like bedding. Use bubble wrap or packing paper for breakables; use towels/linen as padding if you’re low on supplies. Put a layer of padding at the bottom before placing anything.
Step 5: Pack smart, label clearly
Pack by category and place an inventory note inside each box (a simple list on a sticky note). Seal and label two sides of the box with: Category, Room (if relevant), and a short inventory. Add a priority mark (e.g., “OPEN FIRST” or “DAY 1 ESSENTIALS”) for boxes you’ll need right away.
Step 6: Stacking and loading logic
When loading boxes into a car or storage unit, stack heavier, sturdier boxes on the bottom and lighter, fragile ones on top. Create an access lane so you can reach the “open first” boxes without moving everything. Keep tools and tape in a visible, single-access container.
Step 7: Final inventory & photo record
Make a simple master inventory (spreadsheet or photo notes) listing box numbers and main contents. Take photos of valuable items before packing and of each sealed box’s label. This small habit saves hours of guessing later and helps with insurance claims if anything goes wrong.
If you want to take your packing to the next level, we also recommend checking out our guide on shelving techniques to maximize space. It shows simple ways to make any small room or storage unit feel more organized and efficient.
Popular Methods to Organize Items for Packing
A quick explanation of the main methods people use, with a small narrative touch.
1. Room-by-Room Method
Simple but sometimes confusing when you often move items between rooms.
2. Category Method
The most efficient for moving or long-term storage.
3. Priority Method
Pack daily-use items separately so unpacking becomes much smoother.
For anyone who needs extra space during the packing process, our Self Storage solution offers secure, flexible units that help you manage your items more efficiently. It pairs perfectly with any organizing or decluttering project.
Pro tip: Prepare one “first day box” filled with essentials like charger, toothbrush, small towel, skincare, and clean clothes.
Case Study: How Organized Packing Saved 30% Storage Space
A realistic example: Fara, age 30, needed to store her belongings for 8 months while renovating. At first, she used three big boxes. After reorganizing with:
- Category sorting
- Labeling
- Vacuum bags for clothes
She ended up needing only two boxes. That’s around 30% space saved, and unpacking time dropped from 4 hours to under 90 minutes. Stories like this show how powerful organized packing can be in real life.
Final Thoughts: And Why You Should Organize Items for Packing with Us
Organizing your belongings may take a little extra time, but learning how to organize items for packing properly always pays off. You protect fragile items, minimize risks during transport, and make sure every box is easy to unpack later. When you organize items for packing in a structured, intentional way, the entire moving or storage process becomes smoother, faster, and far less stressful.
If you’re getting ready to store your belongings or preparing for a move, our website provides secure, flexible storage solutions designed to support the way you organize items for packing. Whether you’re sorting personal essentials, categorizing business inventory, or preparing seasonal items, we make it easier to keep everything neat, safe, and accessible.
Visit The Storage Place to start organizing smarter and ensure your packing process stays efficient from beginning to end solutions that make the whole process smoother. Whether you need a small unit for personal items or a larger space for business storage, we’re here to help you keep things neat, safe, and accessible.
Pro Tips: Start earlier than you think because packing always ends up taking more time than planned. Put heavy items in smaller boxes so they don’t feel like bricks when you lift them. After sealing a box, label at least two sides so you’re not flipping everything around later. Keep one small “essentials” box aside for the first day, and when your space starts to feel cramped or messy, that’s usually the sign you’ll benefit from renting a proper storage unit. Feel free to explore our services, we’re here to make organizing and storing your items easier and stress-free.
Frequently Asked Questions
Where should I start if I feel totally overwhelmed?
Start with one small corner. Don’t try to handle the whole room at once.
Should clothes be rolled or folded?
Rolling saves space, Folding keeps things neat. Choose what you prefer.
Do I need expensive boxes?
Not really. Just make sure they are sturdy and dry.
Is it safe to store electronics?
Yes, as long as they’re wrapped properly and stored in climate-controlled units.
How many labels should I use?
At least two sides of every box, so you can see them from multiple angles.